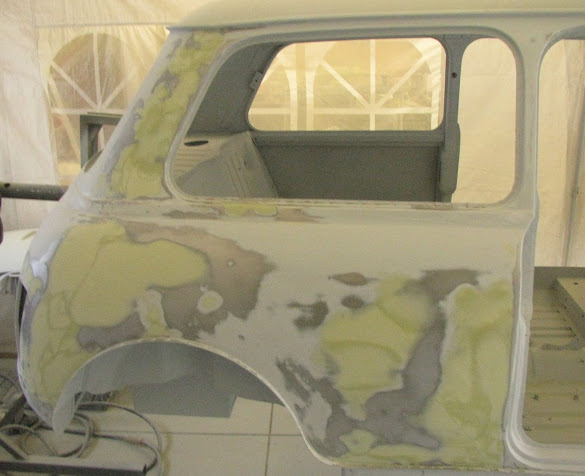
Both sides of the shell were worked on with repeated applications of filler and sanding to get everything mostly flat/smooth, and all areas with filler or bare metal were resealed with 2 coats of epoxy primer.
Passenger side :


Whilst working on the drivers side I found that I had missed an issue on the side panel. There was a 2-3mm indent in the side panel due to the seam (at the bottom of the panel) and side panel not being aligned correctly when the new sill panel was welded on.

I didn't want to simply fill this up with body filler so I cut and split the body side/sill seam, pushed out the side panel and rewelded the seam. The result was 0.5mm (at most) indent.
Drivers side after filler/sanding :
I also 3D printed a simple piece specifically for the rear quarter window opening when I was filling/sanding a rust repair.


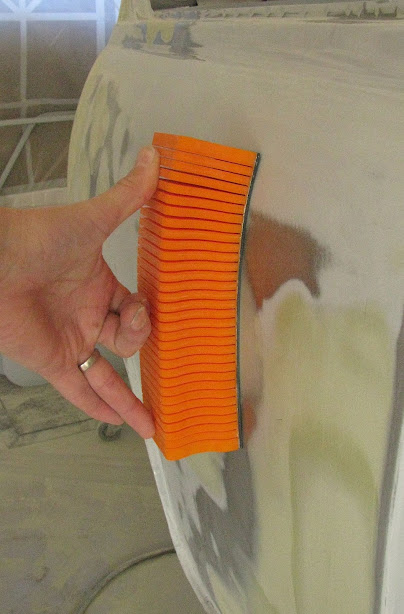
Much of the rear section (and roof) of a Mini is very curvy so to make it easier to check the profiles of these types of panel curves, I designed and 3D printed a flexible 200mm sanding block. The print has a 2mm neoprene pad glued to the base and uses either 70mm wide PSA (sticky/self-adhesive) or 115mm sandpaper to wrap over the base. This block won't be used for the main sanding work, but will be more for sanity checks after guide coat is applied.

The rear bumper has been deseamed so this required a thin skim of filler over a majority of the beaver panel to get a even curvature over the panel.


Comments
Post a Comment