The EFI Mini fuel tank that I'll be using was never fitted to my Australian model Mini so I had to make a new mount for the tank strap. The mount (copied from a UK Mini factory mount) was easy to bend up and weld to the boot floor for the tank strap bolt.

I had to previously make some relief cuts the in the guard below the A-pillar to straighten the panel (on both sides of the Mini). Using some panel welding clamps to align the panel pieces it was welded back together.

The factory Mini fresh air duct connection (that connects the drivers side wheel arch to the cabin) is redundant in this build so I decided to block it off.
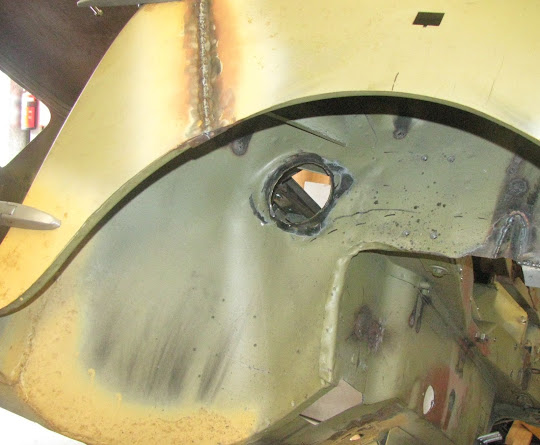
Photo from inside the cabin with blanking plate welded in :
I welded on some cable mounts to the front wheel arches for the side indicator wiring. The shell was upside-down on the rotisserie in this photo :

The modification of the handbrake mount (mount holes moved 50mm rearward) had to be finished by welding up the section of exhaust tunnel that was previously cut out and tack welded in place.
Before (tacks only) :
After (fully welded) :
The deseam work on the C-pillars that I had done by a 3rd party resulted in low quality welding, and thin metal from being ground back too much. The welds that were on the inside of the C-pillar were atrocious with a large number of pinholes in the welds :
To add strength back into these areas I chose to weld some backing plates on the inside of the seam but first had to do some panel beating to straighten some C-pillar sections as best I could, as some areas such as this had the seam badly misaligned.
C-pillar before :
C-pillar after some cut/weld/panel beating work :
After grinding back the bad welds and rewelding some of the seam sections, the backing plates made from 30mm x 1.6mm steel were tacked then welded on the inside of the C-pillar. First was two plates for the inside of the C-pillar :

Then a ~500mm curved piece was made for the seam section in the body under the C-pillar (in the boot)
Tacked in
It was a bit difficult to access all of the plate in the boot, but I eventually got there. It looks a little messy but it's absolutely welded in securely.
The front bumper area had to be fully welded to join the lower front & side panels
The seat frames in the Mini are secured by bolts that pass up through the floorpan (strengthened with 3mm steel backing plates welded to the floorpan) however I never got around to adding those plates for the front pairs of seat bolts. This was a quick task to weld a 50x40x
3mm steel plate to the floorpan for each mounting bolt.

I had previously changed the location of one of the battery cable through-connectors in the boot floor so I had to extend the battery ground cable around battery box and weld on some cable mounts to the underside of the boot floor to secure the cable.

All the drain holes and tooling holes in the floorpan (about a dozen holes) needed to be welded/blanked off, such as these six under the rear seat :

In each door where the upper/lower external hinges bolt through - right near the edge of the door - there is no even surface on the inside for the washer & nut to tighten against due to how the door skin panel folds over the door edge. The holes are also very elongated - approx 13x8mm and far bigger than needed for the 1/4" hinge bolts.

The oversized holes are generally used for adjustment when hanging the doors, however I hung and aligned the doors then marked the exact location needed for the hinge bolt. I then welded multiple layers of 0.7mm small steel pieces to blank off the outer and inner skin, and provide a supportive flat surface for a washer and nut. A new 8mm hole was then drilled in the location previously marked.

One issue with the top external hinge is that the bolts do not actually align with the door (who designs a hinge like this??)

A simple fix was to make a couple of thick stainless steel washers with an angle to suit.

...and to make it easier to align the washer when tightening the bolt, I cut a small notch in the top as a visual indicator.


Comments
Post a Comment